A6M5 Hei
OLD‑WIKI.WARTHUNDER.COM (DEFUNCT)
| This page is about the Japanese fighter A6M5 Hei. For other versions, see A6M (Family). |
Description
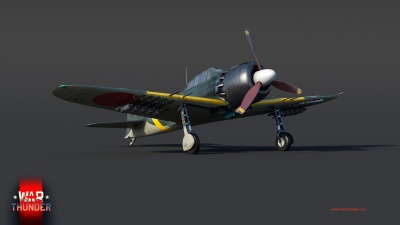
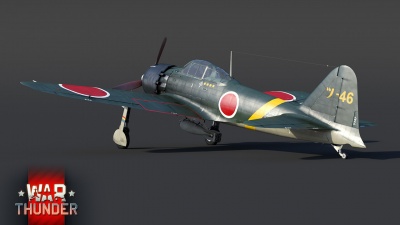
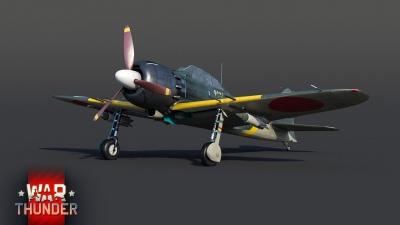
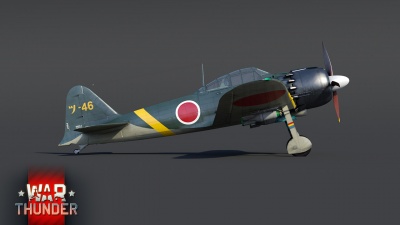
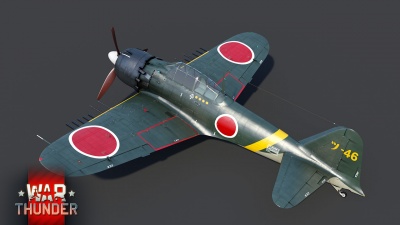
The A6M5 mod. 52 Hei, designated as the Type 0 Carrier-based Fighter Model 52C (零式艦上戦闘機五二型丙), was the third and last minor modification of the A6M5. It offers the most firepower of the A6M series, with the inclusion of a Type 3 (13.2 mm) HMG in each wing and 4 rocket racks underneath, and on top of that, the last Type 97 (7.7 mm) was removed. Next to armament changes, it also increases the survivability of the plane with thicker wing armour, and armour was installed behind the pilot seat. Because of the gain in weight, this variant was used mainly for intercepting B-29s and special attacks.
It was introduced in Update "Ixwa Strike". Together with the A6M6 mod.53, the A6M5 mod. 52C is a heavy interceptor attacker variant of the A6M which deplete their manoeuvrability for more armament, ordnance and survivability. This A6M shouldn't be conventionally used like its previous models, being far heavier and less manoeuvrable leaves it to be forced in Boom-N-Zoom approaches, bomber interception and potentially ground attacking.
- Nicknames
- IJN Pilot nickname: Reisen (零戦) / Zerosen (ゼロ戦) (Abbreviation of 0 - 戦).
- Allied reporting name: Zeke / Zero.
General info
Flight performance

Due to the weight of the armour protecting the pilot and the additional heavy machine guns, the climb rate of this plane is rather poor for its BR. The engine won't overheat under combat conditions. The A6M5 Hei can feel quite sluggish as it cannot turn as well as other planes in the A6M5 family. While the plane's turning ability is hampered by the extra weight, players will still be able to out-turn every other plane.
| Characteristics | Max Speed (km/h at 6,000 m) |
Max altitude (metres) |
Turn time (seconds) |
Rate of climb (metres/second) |
Take-off run (metres) | |||
|---|---|---|---|---|---|---|---|---|
| AB | RB | AB | RB | AB | RB | |||
| Stock | 519 | 503 | 20.9 | 21.6 | 8.1 | 8.1 | 300 | |
| Upgraded | 563 | 540 | 19.1 | 20.0 | 14.7 | 11.1 | ||
Details
| Features | ||||
|---|---|---|---|---|
| Combat flaps | Take-off flaps | Landing flaps | Air brakes | Arrestor gear |
| ✓ | ✓ | ✓ | X | ✓ |
| Limits | ||||||
|---|---|---|---|---|---|---|
| Wings (km/h) | Gear (km/h) | Flaps (km/h) | Max Static G | |||
| Combat | Take-off | Landing | + | - | ||
| 740 | 397 | 368 | 220 | ~14 | ~6 | |
| Optimal velocities (km/h) | |||
|---|---|---|---|
| Ailerons | Rudder | Elevators | Radiator |
| < 280 | < 420 | < 410 | > 335 |
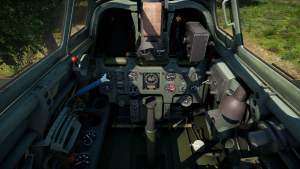
Survivability and armour
The A6M5 hei has three armoured components:
- 45 mm bulletproof glass in front of the pilot, angled at 68°
- 55 mm bulletproof glass behind the pilot, angled at 12°
- 8 mm of steel behind the pilot, angled at 12°
This armour is enough to survive light machine gun fire and light AA fire. However, the A6M5 Hei is still very fragile: don't rely solely on this armour, because the guns you will be facing at its battle rating will not be stopped by it.
Modifications and economy
Armaments
Offensive armament
The A6M5 Hei is armed with:
- 2 x 20 mm Type 99 Model 2 cannons, wing-mounted (125 rpg = 250 total)
- 2 x 13.2 mm Type 3 machine guns, wing-mounted (240 rpg = 480 total)
- 1 x 13.2 mm Type 3 machine gun, nose-mounted (230 rpg)

Suspended armament
The A6M5 Hei can be outfitted with the following ordnance:
- Without load
- 2 x 60 kg Navy Type 97 Number 6 bombs (120 kg total)
- 1 x 250 kg Navy Type Number 25 Model 2 bomb (250 kg total)
- 10 x Type 3 No.1 Mod.28 Mk.1 rockets
- 2 x Type 3 No.6 Mod.27 Mk.1 rockets

Usage in battles
- Realistic Battles
In Air RB, your primary focus is to engage fighters. Do not bring any payload options for this plane, as it will weigh you down significantly. Select 400 m for the gun convergence, use the Ground Targets belt for your 13 mm guns, and the Universal or Tracers belts for your 20 mm cannons. Climb at a 15° angle and you may want to try a slight side climb on smaller maps. Try climbing and staying with your team. You will be outclassed by many fighters, so play to your strengths. Engage targets that have low energy states, and try to dogfight them. Do not engage in head-ons or high altitude fighting and stay close to your allied aircraft, as the A6M5 hei works well when an enemy is overfocused on an allied plane. Try not to stall out in this plane, as your weight is increased and the relatively weak engine won't allow you to recover from stalls easily.
- Arcade Battles
In Air Arcade, this plane is extremely versatile: it can engage enemy ground units with rockets, intercept bombers and hunt enemy fighters. Engage in turnfights to reduce your exposure to enemy fire and play with caution, as this plane is fragile.
- Mixed Battles (Ground/Naval)
In mixed battles, the 250 kg bomb is your best option. You can fly extremely low to the ground thanks to the plane's superb manoeuvrability. Set a 1.5 second fuse on the bomb and drop it really close to the target. Once you have spent all ordnance, you can either take on fighter duties or return to the airfield and rearm.
- Specific enemies worth noting
- P-51 (Family): as always, anything with 0.50 cal Brownings is a threat to the A6M5 hei. These planes will always try to boom and zoom and light you an fire. These planes will usually have an altitude advantage, thanks to their amazing climb rate. To engage these fighters, make sure you have a good speed and room to dodge attacks. Try to bait a P-51 to lower altitudes or close to friendly fighters. The best way to kill an energy fighter is when it is low and slow.
- Bf 109 (Family): this planes' superb climb and energy retention allow them to make multiple boom and zoom attacks on you. Dodge these by making evasive loops to throw off the pilot and make them overshoot. Do not engage in head-ons with a Bf 109.
- XP-55: the XP-55 outperforms you in every way possible. Play smart when facing these planes, and stick with your team.
Manual Engine Control
| MEC elements | ||||||
|---|---|---|---|---|---|---|
| Mixer | Pitch | Radiator | Supercharger | Turbocharger | ||
| Oil | Water | Type | ||||
| Controllable | Controllable Not auto controlled |
Controllable Not auto controlled |
Controllable Not auto controlled |
Separate | Controllable 2 gears |
Not controllable |
The Zero's manual engine controls are simple to learn. The propeller pitch should be kept at 95% at all times. The radiators both should be kept between 5 and 15% depending if you are on a hot or cold map. The second supercharger gear should be activated at 3,500 m and above.
Pros and cons
Pros:
- First A6M5 with significant armour combined with a self-sealing fuel tanks
- Very good agility
- Turning radius is tight; can out-turn most aircraft it faces in a sustained turning engagement
- Easy to handle, as the aircraft is very responsive in all axes
- Short takeoff/landing distance; can land on aircraft carriers if the map has them with the arresting hook
- Fairly destructive 20 mm cannon armament
- Gets air-to-air time-fused rockets
Cons:
- Highly vulnerable to Boom & Zoom tactics with very limited counterplay options
- High agility results in excessive speed bleed when manoeuvring, leaving you low on energy compared to your opponent
- Plane is highly dependent on the enemy engaging it on its own terms (turnfighting), and if denied this will struggle to accomplish much in a match
- Noticeably slower top speed than contemporaries
- Added mass of the armour decreased agility and climb speed
- Fairly limited ammunition count
- Despite having an improved armament over the predecessors, it's still only average for the BR
- Poor dive tolerance; Wings rip at only 700 km/h
- Control stiffening at high speeds can limit agility, can lead to fatal dives
History
In 1944, the A6M5 Otsu failed to meet the expectations of Japanese military leaders, turning out to be just a half-measure in an attempt of aircraft engineers to modernize the A6M fighter. Furthermore Japan was in a situation where no replacement for the outdated Zero had been found yet, with the aircraft that have been designed as replacements continuously suffered setbacks and engine deficits while the war situation continued to worsen for Japan.
Faced with the increasing threat of American high-altitude bombing raids, Japanese engineers had little choice but to further modify the A6M, despite knowing it was vastly inferior to the latest aircraft flown by the Allies. As a result, in September 1944, Mitsubishi rolled out the A6M5 Hei; a modification of the late war 'Zero' design, but outfitted with a stronger weapons arsenal, including an expanded range of secondary weapons the aircraft could carry.
Tests of the aircraft revealed substantially degraded performance characteristics over previous variants due to weight increases. As fitting the aircraft with a different, more powerful engine, wasn't possible, the A6M5 Hei was accepted into service nonetheless, despite its worse performance. However, as the A6M5 Hei entered production in the last stages of WWII, its production numbers remained low, chiefly due to the decreasing Japanese industrial capacity in the final months of the war. In total, over 90 units of the A6M5 Hei were produced by Mitsubishi alone by the end of WWII, with no available production data from Nakajima.
-From Devblog
Media
- Skins
- Images

See also
Links to the articles on the War Thunder Wiki that you think will be useful for the reader, for example:
- reference to the series of the aircraft;
- links to approximate analogues of other nations and research trees.
External links
| Mitsubishi Company (三菱商会) | |
|---|---|
| Fighters | A5M4 · Hagiri's A5M4 |
| A6M2 mod. 11 · A6M2 · A6M3 · A6M3 mod. 22 · A6M3 mod. 22Ko · A6M5 · A6M5 Ko · A6M5 otsu · A6M5 Hei · A6M6c | |
| A7M1 (NK9H) · A7M2 | |
| J2M2 · J2M3 · J2M4 Kai · J2M5 · J2M5 (30 mm) | |
| Hydroplanes | F1M2 |
| Interceptors | Ki-83 · Ki-109 |
| Bombers | G4M1 |
| Ki-21-Ia · Ki-21-I hei · Ki-67-I Ko · Ki-67-I otsu | |
| Jet Fighters | Ki-200 |
| Captured | ▃A6M2 · ␗A6M2 |
| See also | Mitsubishi Heavy Industries, Ltd. (Post-War) |
| Japan fighters | |
|---|---|
| Navy | |
| Carrier-based fighter | |
| A5M | A5M4 · Hagiri's A5M4 |
| A6M | A6M2 mod. 11 · A6M2 · A6M3 · A6M3 mod. 22 · A6M3 mod. 22Ko · A6M5 · A6M5 Ko · A6M5 otsu · A6M5 Hei · A6M6c |
| A7He | A7He1* |
| A7M | A7M1 (NK9H) · A7M2 |
| Land-based Fighter | |
| J2M | J2M2 · J2M3 · J2M4 Kai · J2M5 · J2M5 (30 mm) |
| J6K | J6K1 |
| J7W | J7W1 |
| N1K-J | N1K1-Ja · N1K2-J · N1K2-Ja |
| Fighter seaplane | |
| N1K | N1K1 |
| A6M-N | A6M2-N |
| Army | |
| Ki-10 | Ki-10-I · Ki-10-I C · Ki-10-II · Ki-10-II C |
| Ki-27 | Ki-27 otsu · Ki-27 otsu Tachiarai |
| Ki-43 | Ki-43-I · Ki-43-II · Ki-43-III otsu |
| Ki-44 | Ki-44-I · Ki-44-I 34 · Ki-44-II otsu · Ki-44-II hei |
| Ki-61 | Ki-61-I ko · Ki-61-I otsu · Ki-61-I hei · Tada's Ki-61-I hei · Ki-61-I tei · Ki-61-II Otsu Kai |
| Ki-84 | Ki-84 ko · Ki-84 otsu · Ki-84 hei |
| Ki-87 | Ki-87 |
| Ki-94 | Ki-94-II |
| Ki-100 | Ki-100 · Ki-100-II |
| Other countries | ▅F4U-1A · ▅P-51C-11-NT · ▅Bf 109 E-7 · ▅Fw 190 A-5 |
| *Imported designation of the He 112 (A6M was in development - A7M would take A7 designation after the cancelation of the A7He) | |