P-47D-22-RE
OLD‑WIKI.WARTHUNDER.COM (DEFUNCT)
| This page is about the American fighter P-47D-22-RE. For other versions, see P-47 (Family). |
Description
The P-47D-22-RE Thunderbolt was one of the last variants in the P-47D family to have a razorback airframe. The D-22-RE and D-23-RA were essentially the same aircraft and both utilized the all-important water injection system. The D-22 received an impressive 3.9 metre (13 foot) propeller which had only 15 cm (6 in) clearance from the ground. The new propeller also increased the climb rate significantly. The D-22 also has the Pratt & Whitney R-2800-63, essentially the R-2800-21 but with water injection installed at the factory. It differs from the -59 in having a less efficient ignition system. The main difference between the D-22-RE and D-23-RA was the specific propeller used. D-22-REs had the Hamilton Standard Hydromatic 24E50-65 propeller whereas the D-23-RA had a Curtiss Electric propeller.
Introduced in Update "Raining Fire", the P-47D-22-RE Thunderbolt is a fairly decent fighter and ground attacker. The main difference between the D-22 and many of the late Thunderbolts is the razorback design behind the cockpit canopy. This design greatly increased stability at higher speeds but has reduced cockpit visibility. The Thunderbolt is much like the "Jug" nickname it was given, it was one of the heaviest single-engine fighters of the war and it shows. Its climb rate is extremely lacklustre and has a poor sustained turn rate. The Thunderbolt can only turn tight for a few turns until it loses its energy, so players should turn only in dire situations. For players planning to use the Thunderbolt as a ground attacker, there are a decent amount of options to choose from. Although it is relatively limited compared to the later Thunderbolts, the D-22 can still carry a mix of bombs and rockets as well as bomb-only loadouts.
General info
Flight performance
In Arcade battles, the P-47 can be pushed to its limits. Climb rate, turn rate, and responsiveness are all dramatically increased. Still, tactics used in RB also apply very well in Arcade- this fighter is great for practising Boom & Zoom in Arcade due to the impressive climb rate in this mode. However, the skill will not be built nearly as well in this mode, as rolling scissors and "skidding" manoeuvres will not really be needed.
Overall, the P-47 is a very pleasurable plane to fly for a quick jaunt in arcade battles.
| Characteristics | Max Speed (km/h at 9,144 m) |
Max altitude (metres) |
Turn time (seconds) |
Rate of climb (metres/second) |
Take-off run (metres) | |||
|---|---|---|---|---|---|---|---|---|
| AB | RB | AB | RB | AB | RB | |||
| Stock | 672 | 653 | 26.2 | 27.0 | 6.6 | 6.6 | 600 | |
| Upgraded | 723 | 695 | 23.9 | 25.0 | 14.6 | 10.0 | ||
Details
| Features | ||||
|---|---|---|---|---|
| Combat flaps | Take-off flaps | Landing flaps | Air brakes | Arrestor gear |
| ✓ | ✓ | ✓ | X | X |
| Limits | ||||||
|---|---|---|---|---|---|---|
| Wings (km/h) | Gear (km/h) | Flaps (km/h) | Max Static G | |||
| Combat | Take-off | Landing | + | - | ||
| 498 | 469 | 320 | ~13 | ~5 | ||
| Optimal velocities (km/h) | |||
|---|---|---|---|
| Ailerons | Rudder | Elevators | Radiator |
| < 402 | < 420 | < 470 | > 335 |
Survivability and armour
The pilot and fuel tanks have decent armour protection from the front, but the engine is vulnerable from the front. The pilot has no armour protection from the rear, leaving him vulnerable.
- 38 mm Bulletproof glass - windshield
- 9.5 mm Steel - Below windshield
- 9.5 mm Steel - Behind engine, in front of fuel tanks and pilot
- Self-sealing fuel tanks
Modifications and economy
Armaments
Offensive armament
The P-47D-22-RE is armed with:
- 8 x 12.7 mm M2 Browning machine guns, wing-mounted (425 rpg = 3,400 total)
Suspended armament
The P-47D-22-RE can be outfitted with the following ordnance:
| 1 | 2 | 3 | 4 | 5 | 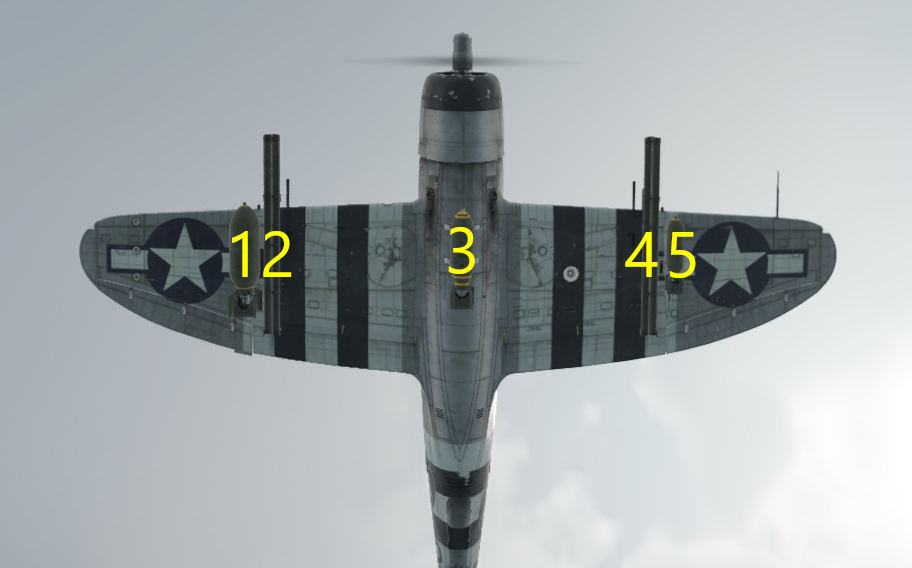 | |
|---|---|---|---|---|---|---|
| 250 lb AN-M57 bombs | 1 | 1 | 1 | |||
| 500 lb AN-M64A1 bombs | 1 | 1 | 1 | |||
| 1,000 lb AN-M65A1 bombs | 1 | 1 | ||||
| M8 rockets | 3 | 3 | ||||
| Maximum permissible loadout weight: 1,340 kg Maximum permissible weight imbalance: 520 kg | ||||||
| Default weapon presets | |
|---|---|
| |
Usage in battles
Air Realistic
The P-47 has a relatively lacklustre climb rate, so it must side-climb or constantly be in an energy disadvantage. While climbing, you can use MEC in order to maximize the performance of the aircraft. You put both radiators at 10%, mixture at 80% and propeller pitch at 80% as well. By side-climbing, you give yourself more time to climb and enemies will not attack you, allowing you to climb uninterrupted. You do not stop climbing at a certain altitude, but rather once you're above or at the altitude of all the enemy fighters so you can have a distinct energy advantage. Turn back in and start accelerating. Now you must chose your targets. Try and chose the target that is directly threatening you the most (the closest enemy or the enemy at the highest energy state) Once you chose a target, start a shallow dive (not a steep one as a shallow dive will more efficiently turn altitude into speed). If the enemy notices you and starts diving to the deck, do not follow them as it is a waste of energy and time. Similarly, if the enemy tries to engage in a dogfight with you, do not accept the bait but keep flying straight and climb back up with the speed you gained in the dive and chose another target to boom and zoom. Rinse and repeat until you've defeated the enemy.
If an enemy gets on your tail, do not dive straight to the deck as that is a matter of power to weight rather than the sheer mass of a plane. Instead, start a shallower climb. Due to the straight line energy retention of the P-47, you will keep speed much better than a lighter fighter. Once they get bored and peel off, or you gain enough distance (around 3.5-4 km) turn back to them and start chasing them. You can afford to spray and the high velocity and volume of fire makes it easier to hit and scare an enemy even at long ranges.
If an enemy dives on you and is gaining on you, attempt to gain as much speed before maneuvering as the P-47 keeps controllability (even becoming more manoeuvrable) at higher speeds where most other enemies begin to lock up. use the excellent roll of the P-47 to evade shots and either force an overshoot or begin outrunning the enemy.
- Simulator/EC
In air Simulator mode, the P-47D-22 RE does not feel as struggling as in RB since simulator is more about situational awareness rather than who climbs the highest in 2 minutes. Its sufficient speed, robust airframe, punching .50 cals and multiple additional options of bombs make it an excellent multi-role aircraft. However, comparing to the later Jugs with all-clear bubble canopy, the razorback P-47 has worse visibility. The front have quite some frames around the gunsight, but they are thin which is a good news. The sides are overall unaffected. The rear view, however, is greatly obstructed by the Razorback, preventing the pilot from seeing what's on the tail which can be fatal sometimes. The early P-47 has the same heavy weight and large size but the engine is not as powerful as the later models, so it will feel more sluggish at lower speeds.
The P-47 can perform ground attack, bomber intercepting and traditional BnZ fighting. Sim is different from realistic, so discard the habit of bringing the least fuel. Bring at least 30 minutes of fuel, although it decreases the plane's performance a bit, it prevents constant refueling which saves time for patrolling and fighting.
For takeoff, while your P-47 accelerates down the runway, dip the nose parallel to the ground to decrease drag. You can use no flaps at all until the speed is above 200 km/h since heavier planes generally need more speed to lift off. This is especially more true if your Jug is carrying a full bombload. As you are fast enough, deploy combat/takeoff flaps, and gently pull the stick back, the P-47 will get airborne easily. Then, retract landing gears, and flaps once you are above ~220 km/h unloaded, or ~260 km/h with bombs. Be careful when manoeuvring with a full bombload, an aircraft this heavy will lose quite some altitude when rolling so watch your altitude if you just took off and are still near the ground.
For ground pounding, use the bombs to take out pillboxes and tanks, and the MG for trucks, AAA, and howitzers. Be around 750 m above the ground so you have enough room to dive at the target and gather enough momentum for the bombs, making them land nearer to where you aimed at. Try to drop as close to the target as possible but do not crash. An ideal dive speed before releasing payload is around 500 km/h. When the gunsight slices through and above the target, drop the 1,000 lbs. When the target is just above the center of the gunsight and fills up around half of it, release the 500 lbs. The 8 MGs are perfect for killing trucks, AA guns and artilleries as they have plenty of ammo and good damage. However, always watch your surroundings, especially your high 6 for any incoming enemies. A steady display of killfeeds onto the opponents' screens will sure alert some of them to come after you.
Due to the rather inadequate climb rate of the P-47D-22 RE, it may be a good option to hunt down low-altitude ground pounders rather than climbing to a bomber's altitude, especially if your airfield is close to the frontline leaving you little room or time to climb. Wander around friendly ground units like tank/truck columns, AAA/howitzer positions and bunkers, they are very likely to attract enemy attackers. Remain at an altitude of ~1200 m until you see a target. You can start diving at it straight away, or if you can get the timing correctly, dive right when the strike aircraft finishes a pass and is climbing up for the next pass, this is when it is the slowest and most unresponsive. Also because of the positions (prey is almost perpendicular in front of the attacker) the target's large cross section of the entire top will be presented to the guns. For a diving P-47, that is pretty much setting oneself up as an easy, large and motionless target. Lead carefully and put a solid burst into it, usually it will get crippled if not destroyed straight away.
As for dogfighting, because almost all aerial battles in Sim occur below 3,000 m, the P-47 can easily climb to this altitude and gather up quite some speed before engaging a battle. The tactic is similar to everyday RB tactics, that is to utilise your speed, powerful guns, and altitude if you have any. If, unfortunately, you find yourself being chased at your 6 and you don't know how to do any defensive manoeuvres, do a large, smooth turn towards the nearest friendly airfield to avoid bleeding too much speed. Then shallow-dive towards your airfield. The P-47 can quite easily outrun opponents like the A6M or Bf-109 E, but struggles to outrun Bf-109 F/G, FW-190 A or another P-47. Another way of disengaging is to do a sudden split-S to dodge under the chaser. Average Sim players will now try and see where you went, if not immediately losing track of you. You can then run for your airfield or shallow climb for another attack. In the heat of an intense fight, do not pull too much/too sudden, the P-47 may enter flat spins. Pull gently, around ~80% to the stick's limit is generally enough.
- Enemies worth noting
- Me 264: This giant is one of the few bombers who get air spawns in Sim, so it usually flies higher than many would think. On top of this, the Me 264 is armed with large calibre MG and cannons all over it, therefore tailing a 264 is basically suicide unless all of their gunners are knocked out. Treat the 264 almost like a B-29 or B-17 as they are very similar in both design and defensive capabilities. It is best to head-on the 264 if possible to easily knock out the pilots due to its glazed nose while also taking minimal damage. However the bomber lacks a ventral turret on its belly, making it easy to deal damage from below, but be wary of the downwards facing rear 20 mm cannon near the tail. The safest way to attack is from a higher altitude, dive at an oblique angle and focus fire on the wings and nose. Never engage if the P-47 has no altitude advantage.
- Bf 110, Ki-45, A-26: As mentioned before, those twin engine aircraft are a big threat since their lack of manoeuvrability comparing to single engine fighters are minimised in Sim. They are usually armed with heavy guns & cannons in the nose, so an accurate burst will tear any plane apart, including the P-47. The P-47 manoeuvres rather sluggishly and the plane might get out-turned from even those heavy fighters, so engage them with either altitude or speed advantage to avoid being targeted. If they are not manoeuvring aggressively, aim for their wings or engines. If the fight is intense and the P-47D-22-RE pilot cannot smooth the aim, just burst anywhere as long as the guns hit them, the 12.7 mm bullets will damage their flight models quite a bit.
- Yak-2 KABB: Do not think that the P-47D-22-RE can confidently outmanoeuvre this plane just because it is twin-engined. The Yak-2 has an amazing turn rate for a heavy fighter, thus the P-47D-22-RE must avoid turning with it, if not dogfighting with it in general. It bears a pair of ShVAK cannons that can easily damage vital parts like engine or cooling systems. It has green camo, greatly resembling an Me 410 but with an H-tail like a Bf 110's.
- ZSD63: A dangerous SPAA to go up against in Tank Realistic Battles. Though it is hard to identify specific SPAA vehicles on the ground (especially when they are shooting tracers at the plane), if a ZSD63 is identified, avoid it at all costs and do not attempt head-ons with it, ever. It can easily snap a wing off by casually putting a short burst in the P-47D-22-RE's flight path. Don't even get close to it unless it is busy shooting someone else or if the P-47D-22-RE has a bomb ready for use. Some identifying features of the ZSD63 is its rather boxy and tall hull with a geometric turret sitting at the back, slightly similar to a Wirbelwind's. The firing manner is also distinctive: the sound and green tracers are very rapid, much like a buzz saw, but then it will remain silent for half a minute reloading. Note that an experienced ZSD player will hold its fire or shoot in single salvos with long halts between, making it look like that it's reloading. Armour-piercing belt is recommended since their high penetration can tear through the ZSD's armour with ease and knock out its crew members.
Manual Engine Control
| MEC elements | ||||||
|---|---|---|---|---|---|---|
| Mixer | Pitch | Radiator | Supercharger | Turbocharger | ||
| Oil | Water | Type | ||||
| Controllable | Controllable Auto control available |
Controllable Not auto controlled |
Controllable Not auto controlled |
Separate | Controllable 1 gear |
Auto controlled |
Pros and cons
Pros:
- Great bomber destroyer against a lone bomber
- Excellent high altitude performance
- If taken care of, can easily fly with one wing
- Muscle car with wings, excellent at Boom and Zoom tactics
- 8 M2 Browning machine guns are accurate at a longer range than most cannons at its BR
- High speed, even while stock
- Very durable which semi-compensates with its lacklustre turn rate
- Plenty of ammo
- Can easily escape enemies with its high speed for its rank
- Great multirole aircraft, can carry various bombs and rockets, acting as an interceptor or ground-attack aircraft
Cons:
- Frontal armour can easily be penetrated by 20 mm rounds
- Can easily snap a wing when even the slightest gunfire hits it
- Poor stall characteristics
- Mediocre climb performance (side climbing recommended)
- Slow and hard to manoeuvre at low altitudes
- Larger than average fighter
- Poor overall performance when mounting payloads
- After attacking ground targets, the P-47 lacks the altitude to Boom & Zoom enemy fighters
- Big engine easily hit during a head-on attack
- Worse cockpit visibility than in the other bubble canopy P-47s
- No armour protection for pilot from behind
History
Describe the history of the creation and combat usage of the aircraft in more detail than in the introduction. If the historical reference turns out to be too long, take it to a separate article, taking a link to the article about the vehicle and adding a block "/History" (example: https://wiki.warthunder.com/(Vehicle-name)/History) and add a link to it here using the main template. Be sure to reference text and sources by using <ref></ref>, as well as adding them at the end of the article with <references />. This section may also include the vehicle's dev blog entry (if applicable) and the in-game encyclopedia description (under === In-game description ===, also if applicable).
Media
- Skins
- Images
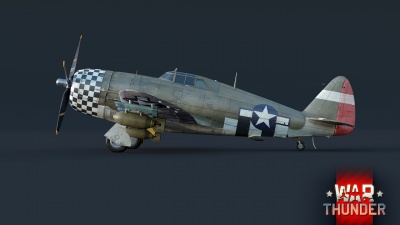
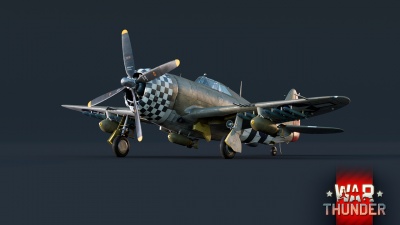
- P-47D-22-RE Devblog Images
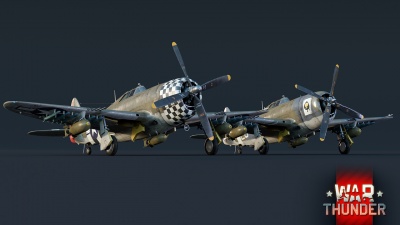
American P-47D-22-RE (left) & British Thunderbolt Mk.1 (right)
- Videos
See also
Links to the articles on the War Thunder Wiki that you think will be useful for the reader, for example:
- reference to the series of the aircraft;
- links to approximate analogues of other nations and research trees.
External links
- [Devblog] New P-47 Thunderbolt Variants
- Official data sheet - more details about the performance
- [Wikipedia] Republic P-47 Thunderbolt
- [Air Vectors] The Republic P-47 Thunderbolt - P-47D / P-47G / XP-47K / XP-47L
| Republic Aviation Corporation | |
|---|---|
| Fighters | P-43A-1 |
| P-47D-22-RE · P-47D-25 · P-47D-28 · P-47M-1-RE · ⋠P-47M-1-RE · P-47N-15 | |
| Jet Aircraft | F-84B-26 · F-84F · F-84G-21-RE |
| F-105D | |
| Export | J9 Early* |
| ␗P-43A-1 | |
| ▄Thunderbolt Mk.1 · ▄P-47D-22-RE · ␗P-47D-23-RA · ▂P-47D-27 · ␗P-47D-30 · ▄P-47D-30 · ␗F-47N-25-RE | |
| ◄F-84F · ▄F-84F (Italy) · ▄F-84F (France) · F-84F IAF · F-84F | |
| ␗F-84G-21-RE · ▄F-84G-21-RE · ▄F-84G-26-RE · ␗F-84G-31-RE | |
| Captured | ▀P-47D-16-RE · ▀P-47D |
| *The company was named "Seversky Aircraft Company" before being renamed in 1939 | |
| USA fighters | |
|---|---|
| P-26 Peashooter | P-26A-33 · P-26A-34 · P-26A-34 M2 · P-26B-35 |
| P-36 Hawk | P-36A · Rasmussen's P-36A · P-36C · ○P-36C · P-36G |
| P-39 Airacobra | P-400 · P-39N-0 · P-39Q-5 |
| P-40 | P-40C · P-40E-1 · P-40E-1 TD · P-40F-10 |
| P-43 Lancer | P-43A-1 |
| P-47 Thunderbolt | P-47D-22-RE · P-47D-25 · P-47D-28 · P-47M-1-RE · ⋠P-47M-1-RE · P-47N-15 |
| P-51 Mustang | P-51 · P-51A (Thunder League) · P-51C-10 · P-51D-5 · P-51D-10 · P-51D-20-NA · P-51D-30 · P-51H-5-NA |
| P-63 Kingcobra | P-63A-5 · P-63A-10 · P-63C-5 · ␠Kingcobra |
| Prototypes | XP-55 |
| F2A Buffalo | F2A-1 · Thach's F2A-1 · F2A-3 |
| BF2C | BF2C-1 |
| F3F | F3F-2 · Galer's F3F-2 |
| F4F Wildcat | F4F-3 · F4F-4 |
| F4U Corsair | F4U-1A · F4U-1A (USMC) · F4U-1D · F4U-1C · F4U-4 · F4U-4B · F4U-4B VMF-214 · F2G-1 |
| F6F Hellcat | F6F-5 · F6F-5N |
| F8F Bearcat | F8F-1 · F8F-1B |
| Other countries | ▃Ki-43-II · ▃Ki-61-Ib · ▃A6M2 · ▃Bf 109 F-4 · ▃Fw 190 A-8 · ▃Spitfire LF Mk IXc |