ZT3A2
Wheeled ground vehicles
OLD‑WIKI.WARTHUNDER.COM (DEFUNCT)
Description
The ZT3A2 Ratel is a rank British tank destroyer with a battle rating of (AB), (RB), and (SB). It was introduced in Update "Ixwa Strike".
General info
Survivability and armour
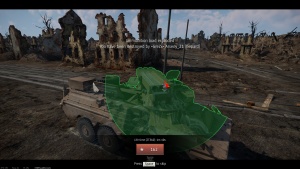
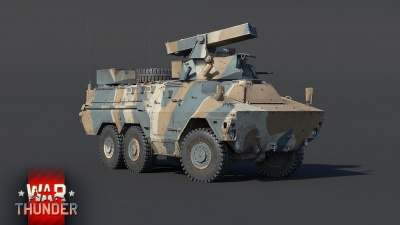
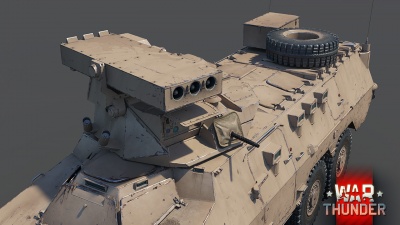
The armour of this vehicle is irrelevant as its launcher is barely protected. The launcher ammunition counts as an active ammo rack, so any ATGM or HE shell detonating next to it will detonate it as well, taking the vehicle out in the process. Even hitting the missiles with any MG can cause them to detonate. Even worse, the ammo rack sometimes does not disappear after firing and definitely reappears in the middle of the reload, even though the vehicle cannot fire yet, so the operator must turn the launcher away when attacked. If the launcher is destroyed past that point, the ammo rack will not disappear but reload progress is still reset.
Frontal hull armour might sustain some MG fire from 500 m away, but it has way too many weak spots with 10 mm or even 8 mm RHA protection to be of any use. Unfortunately, the commander of the ZT3A2 cannot take control of the weapon to fire, meaning that literally anything and anyone can disarm the ZT3A2 with a well-placed shot.
Both commander and gunner are located in the turret, which must be exposed to fire in most cases, which makes this tank very easy to disable if not destroy outright. Sometimes, one of them will survive if the tank took a glancing hit of APFSDS, and ammunition is being stored along the sides of the carrier, so with some luck such shells will pass through the entire vehicle without doing any more damage.
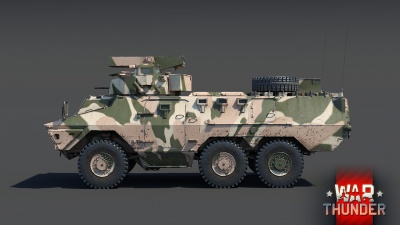
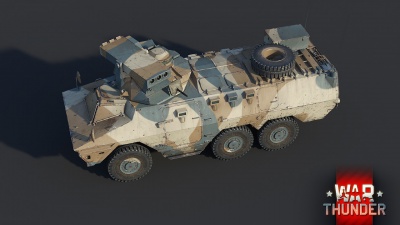
One might argue that the ZT3A2's long hull might confuse enemies, but overpressure damage and missile ammo racks placed along the entirety of it make the spaced armour argument irrelevant in most scenarios. Any ATGM landing next to it will instantly destroy it, particularly the ones with 4 kg explosive mass. Missiles with wide splash radius can do fatal damage even by hitting the top of the tree 20 m away from ZT3A2.
Aircraft strafing the ZT3A2 often prefer to fire at it from the top and focus fire in the middle of it, so cannon based airstrike might fail to destroy the ZT3A2, but any rockets will obliterate the entire hull due to overpressure damage.
Artillery will obliterate this tank even with a 20 m miss and any artillery warning should be a cue to leave for anyone using the ZT3A2. Sometimes the shells land far enough to only cause minor overpressure damage, but the crew will only endure 4 hits at best.
The ZT3A2 has smoke grenades, but these are outdated old smoke grenades and there is only one group of them. Smoke grenades are launched very high up in the direction the turret is facing, so it takes 4 seconds for them to hit the ground and then 5 seconds to set in. The smoke screen has gaps in it and usually is not enough to provide proper detection protection in AB, unless you park inside of it.
Therefore, the smoke must be used long before the enemy reached your position, not when it is already too late, and should not be relied on in AB. Another way to use them is to launch them at the same time as the ATGM salvo - by the time the carrier runs out of ATGMs, the smoke grenades connect with the ground, concealing the vehicle.
Armour type:
| Armour | Front (Slope angle) | Sides | Rear | Roof |
|---|---|---|---|---|
| Hull | ___ mm | ___ mm Top ___ mm Bottom |
___ mm | ___ - ___ mm |
| Turret | ___ - ___ mm Turret front ___ mm Gun mantlet |
___ - ___ mm | ___ - ___ mm | ___ - ___ mm |
| Cupola | ___ mm | ___ mm | ___ mm | ___ mm |
Notes:
Mobility
In arcade battles, the stock ZT3A2 drives at 30-40 km/h offroad and 60-77 km/h on dirt roads. When using paved roads, it will accelerate towards 100 km/h instead. An upgraded ZT3A2 does not drive much faster due to the engine only working at 1,700-2,000 RPM almost all the time, but it will reach 40 km/h almost as fast as it reached 30 km/h before and will reach its top speed on paved roads far more reliably. The maximum speed limits do not really change at all.
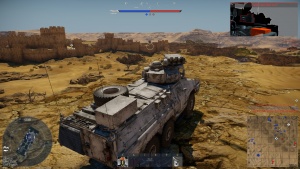
The ZT3A2 tends to have a lot of momentum in its movement and will keep its speed for some time after going off road, but also should be driven carefully to avoid losing speed by accidentally ramming something. Its mass is also not enough to plough through thick trees, so they must be avoided. When reaching the maximum possible speed, the engine starts whining really loudly and the vehicle will start to shake, so turning becomes risky.
This tank also has an uncanny ability to drive uphill at very sharp angles, which may slow it to 5 km/h but won't stop it entirely. This, combined with the "Tires" upgrade, allows it to climb even certain mountains. The tank can also easily climb rocks and other objects, which tend to be impossible for regular tanks to get over. Unfortunately, this ability is rarely of any use in RB due to its low camera depression, so it is mostly used in AB to sneak shots into players not expecting a missile tank firing from weird positions.
| Game Mode | Max Speed (km/h) | Weight (tons) | Engine power (horsepower) | Power-to-weight ratio (hp/ton) | |||
|---|---|---|---|---|---|---|---|
| Forward | Reverse | Stock | Upgraded | Stock | Upgraded | ||
| Arcade | Expression error: Unexpected * operator. | 401 | Expression error: Unexpected round operator. | __.__ | |||
| Realistic | 249 | Expression error: Unexpected round operator. | __.__ | ||||
Modifications and economy
Researching "Horizontal Drive" might make controlling missiles in RB slightly easier and will allow the user to respond to sudden flank attacks, but "Parts" should be researched first. Research "Brakes" instead of FPE to improve the ZT3A2s ability to fire fast. "Elevation mechanism" in theory could help, but isn't necessary and can be skipped. Research "Tandem missile" as soon as possible, as it will help fight tanks of higher BR. Mobility upgrades might make the ZT3A2 faster, but their usefulness is very limited, with "Tires" and "Engine" bringing the most noticeable benefit. "Smoke grenades" might help the ZT3A2 to survive in between reloads or if it got caught in a crossfire, so it might be a good idea to research them first instead. "Laser rangefinder" is only really useful to see if the enemy is within the missile attack range, but it will also trigger laser warnings and is useless in AB, so it can be researched last.
Armaments
Main armament
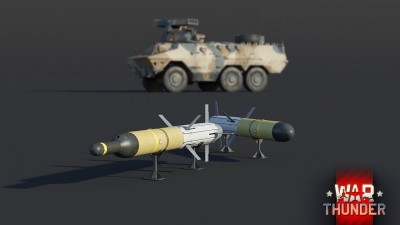
There are two main missiles on the ZT3A2, the ZT3A1 and ZT3A2. Both missiles are laser-guided, which makes them immune to jamming by IRCM and allows the carrier to guide them all at once. Both missiles have reasonably strong vertical drive and rather sluggish horizontal drive, allowing the operator to quickly shift them up or down, as long as they do not try to change their flight direction, in which case the missiles will start to lose control and wiggle, only stabilizing after at least 400 m. These missiles also can cause overpressure damage through more RHA than would be expected from a normal HEAT warhead, meaning they can destroy many medium tanks by hitting their turret's rooftop.
The missiles are loaded in magazines of 3 missiles with 5 magazines or 15 missiles total. They aren't reloaded if the launcher is damaged. Each shot forces a 0.6s reload. Missiles fire off in order from the right to the left. Missiles struggle to take off and initially take a vertical stance, sometimes even obscuring the gunner's vision, so attempts to launch them downward while having the launcher peek over an object is likely to make them explode on launch.
In AB/RB the guiding "camera" is located in the launcher, which means that it can fire and guide straight after exposing the launcher. In SB, missiles are guided by the gunner's optics under the launcher, which means that the hull must also be exposed.
In terms of speed, the ZT3A1 can be treated like a MILAN 2 with 40 more km/h speed on it. It often fails to break through light tanks and will only destroy ERA screens, but not break through them in most cases. Regardless, they are still very strong and there are 3 of them at once, so it is possible to destroy an entire tank squad if they are not paying attention to their surroundings and stand close to each other. These missiles can cause overpressure through 20 mm RHA, which means one can destroy Leopard by hitting the top of its roof.
The ZT3A2 has a tandem warhead, which allows it to penetrate one obstacle (primarily, ERA of Soviet or French tanks) without wasting the HEAT payload, and it in general has more penetration than all of the rank VI ATGMs, easily breaching and obliterating any tanks they land on. Unfortunately, some light tanks like the TAM can still somehow survive a direct hit, so aiming at weak spots is still recommended. This missile can cause overpressure through 30 mm RHA, so even many Soviet tank roofs aren't safe from it, so even if they hide the hull they are still an easy target.
Both missiles are easier to aim by using the sniper scope, even in arcade mode and at point-blank range, as the sniper scope makes it easier to see the missile's position via the light it emits onto the ground and thus easier to force them to fall into enemy cover.
| ZT3 missile | Turret rotation speed (°/s) | Reloading rate (seconds) | |||||||||||
|---|---|---|---|---|---|---|---|---|---|---|---|---|---|
| Mode | Capacity (Belt) | Vertical | Horizontal | Stabilizer | Stock | Upgraded | Full | Expert | Aced | Stock | Full | Expert | Aced |
| Arcade | 15 (3) | -5°/+15° | ±180° | Two-plane | 35.2 | 48.8 | 59.2 | 65.5 | 69.7 | 19.50 | 17.25 | 15.90 | 15.00 |
| Realistic | 23.8 | 28.0 | 34.0 | 37.6 | 40.0 | ||||||||
Ammunition
| Penetration statistics | |||||||
|---|---|---|---|---|---|---|---|
| Ammunition | Type of warhead |
Penetration @ 0° Angle of Attack (mm) | |||||
| 10 m | 100 m | 500 m | 1,000 m | 1,500 m | 2,000 m | ||
| ZT3A1 | ATGM | 650 | 650 | 650 | 650 | 650 | 650 |
| ZT3A2 | ATGM (tandem) | 1,000 | 1,000 | 1,000 | 1,000 | 1,000 | 1,000 |
| Missile details | ||||||||||||
|---|---|---|---|---|---|---|---|---|---|---|---|---|
| Ammunition | Type of warhead |
Velocity (m/s) |
Range (m) |
Projectile mass (kg) |
Fuse delay (m) |
Fuse sensitivity (mm) |
Explosive mass (TNT equivalent) (kg) |
Ricochet | ||||
| 0% | 50% | 100% | ||||||||||
| ZT3A1 | ATGM | 240 | 4,000 | 26 | 0 | 0.01 | 3.58 | 80° | 82° | 90° | ||
| ZT3A2 | ATGM (tandem) | 220 | 5,000 | 28.5 | 0.4 | 0.01 | 3.58 | 80° | 82° | 90° | ||
Ammo racks
| Full ammo |
1st rack empty |
2nd rack empty |
3rd rack empty |
4th rack empty |
5th rack empty |
6th rack empty |
Visual discrepancy |
|---|---|---|---|---|---|---|---|
| 5 | __ (+__) | __ (+__) | __ (+__) | __ (+__) | __ (+__) | __ (+__) | __ |
Machine guns
This MG fires way too slowly to be of any combat use, but if the ZT3A2 is attacked by a hostile ATGM carrier, it should be fired at the incoming missiles for a small chance of shooting them down mid-air.
| 7.62 mm Browning MG4 | ||||
|---|---|---|---|---|
| Mount | Capacity (Belt) | Fire rate | Vertical | Horizontal |
| Pintle | 2,000 (250) | 500 | -10°/+20° | N/A |
Usage in battles
Arcade mode
It can be used on a map with a road leading off your spawn towards a capture point to quickly take over a strong defensive position. Do note, that it will only reach maximum speed if uses asphalt road and it might need a head start for that anyway. Any position that the enemy has to attack into and cannot attack indirectly is worth taking over like this. For example, on the map "Middle East" it can rush into the north capture point and fall down into cover of a bunker or change direction to drive behind a building to avoid being sniped. This position is well protected, and also allows it to abuse simplified AB ATGM controls to deny any access to the capture point for the enemy team, as it has strong vertical missile control and can snipe attacking enemy tanks by just pointing the sniper scope at them after firing out and over cover.
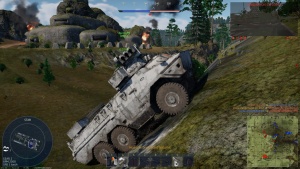
It can also be used to drive to the side of attacking enemies to sneak shots into them. You can also do this in a more provocative manner by hiding behind buildings next to them, but be aware that you then have to rely on your team to act as a distraction and you should avoid being seen and especially avoid or destroy light tanks to not get unnecessary attention. While sneaking in AB is difficult, it is still rather easy to sneak up on Soviet players and heavy tanks in general as long as you understand the game mechanics. Do note, that in AB the ZT3A2 does not have the constraints of "gun depression" and is able to fire off any kind of ground spikes, therefore it might be a good idea to climb any weird ground formation or rocks if it allows you to fire over buildings or other enemy cover, or at least give you a second before the enemy can process what is going on and react. In case enemy light tanks with chemical weapons did spot you, it's often possible to still beat them by hiding behind a destructible building, waiting for them to pull out of cover to stare at you, then unloading the entire magazine onto them through your own cover, instead of going around it. This kind of move is considered pure insanity for the tanks with just one or two weapons, but not for the 3-shot magazine of the ZT3A2, since even after your cover is gone, you still have one or two shots to destroy any opponent jumping in for a free kill.
There is also a possibility of using the ZT3A2's tall profile to fire over or through the openings of indestructible buildings at the tanks standing on the other side, for example big tall windows of churches, which can allow you to capture a point with minimal effort. It is also possible to fire through some street corners, as many of them have little openings and cracks which are often overlooked, such as ones on the south side of Port Novorossiysk domination mode, when there can be at least 6 tanks waiting for you to rush them, but not noticing a very little window next to them which you can fire through. This tactic is usually successful, as at close range it is impossible for regular tanks to fire back, and at long range your launcher is such a small target, only a specialist will be able to notice and hit you back. Be careful with the missile launching pattern, so as to not hit your own cover. Do not forget that the ZT3A2 can destroy many medium tanks by hitting their commander cupola, so it's not necessary to even engage them directly most of the time.
It can be easily used as a sniper tank, with the main advantage of it being able to destroy an entire tank group almost simultaneously or obliterate enemy cover with the first missile, which is immediately followed by another two hitting their turret and hull. Multiple missiles can be sent over cover if the target managed to survive the first hit as well. Likewise, it is possible to just send all 3 missiles through a forest in hopes that they will be able to brute force the foliage and hit enemy tanks anyway. It is also possible to drive missiles into enemy ATGM tanks over hills when they are reloading, but it might be too difficult to time correctly, unless the missile is guided next to the ground and you keep its position by tracking the light it emits onto the ground. Remember to immediately hide after such attacks and in general fire into enemy tank sides to avoid being countersniped.
In any case, be very wary of your reload timings - locate targets, gain as much of an unfair advantage over them, like tall cover you can fire over and they cannot, as possible, then fully commit to your attack when they seem to lose focus. Each shot forces a 0.6-second "reload" and in that time you must point the missile at your first target and decide who needs to be destroyed next, then fire the next missile. If the enemy group is very spread out, guide each missile till the very end and focus on enemies that clearly noticed that they are being attacked and start turning towards you. After firing three shots, back off into cover before anyone decided to fire back. If the enemy managed to destroy the launcher, turn around and make a complete retreat, especially if it was already empty, as repair will take at least 5 seconds and reloading after this will take from 15 to 20 seconds, making you unable to recover from that kind of damage fast enough.
Overall, in AB the ZT3A2's efficiency depends on a lot of factors outside of the player's control - if everyone will focus on it, you will not be able to do much, especially from long range, as it takes just one or two good hits of virtually any weapon to destroy the ZT3A2, but you should be already used to play around enemy with aim assist at this point.
Notable enemies
- Proximity missile carriers: avoid gaining the attention of vehicles with TOW-2B or BILL missiles since their missiles can explode above enemy tanks and the ZT3A2's armour is too thin to survive overpressure damage. Locate and destroy them immediately, if you can, or run very far away, as simple cover of a hill or a wall won't protect against them. If forced to fight them head-on (preferably in AB only): ensure that your launcher is fully loaded, position yourself as far away from them as possible and put the hull low behind cover to avoid being obliterated by a gun, but high enough to be visible. Natural reaction to this for most such light tanks is to start spamming ATGMs at you, this is where the 3-shot magazine of the ZT3A2 comes into play. Since proximity missiles have the tendency to react to anything they fly next to, your answer should be firing a missile of your own. Once they are out of ammo, drop the third shot straight into their turret or run.
- Wheeled light tanks: the ZT3A2 is on average two times slower than light tanks on wheels at the same rank due to its negligible off-road speed, as it averages at a speed of a fast medium tank or slower light tanks even with the best player effort. It is too likely to meet a player, that can and will fire their guns while driving at a full 90+ km/h, but maybe you will be able to do an emergency stop and destroy them (or at least destroy each other). It is even more likely to meet 4 of such tanks already standing next to a capture point that you were intending to attack, so don't be overconfident and be careful with rushing attacks into capture points with lots of low cover (which the ZT3A2 can't use as it's too tall). Do not act as if you are the only person who can rush, as otherwise the ZT3A2 will get gunned down before even doing anything, since it can't fire on the move.
- XM-1 (GM): this tank has NERA screen in the turret, and is as fast as a light tank. Try to hit it in the hull or at least angle the missile down before it lands on the turret, if you use the default missile. Tandem missiles should be able to penetrate it regardless. Avoid engaging it directly, as it has way too many machine guns.
- IT-1: This tank is more dangerous than it seems, as it can fire on the move and is difficult to hit. Try to not park next to trees or walls when fighting it to avoid being overpressured. Fortunately, due to the insane overpressure damage of the ZT3A2, it is possible to destroy IT-1 by hitting its missile or the fake panel on the turret's front that allows it to reload, as it's only 25 mm thick. Therefore, it's best to attack when IT-1 is about to reload - since their missile rack does not explode from damage, they are often very arrogant and are unlikely to try and dodge your shot, instead they will move in to fire. Another opportunity to hit them is to fight them over a hill and abuse strong vertical drives of your missiles to hit them as they retreat, but it's less feasible in RB/SB.
- T-55AMD-1: this tank is annoying, as if it is looking in your direction, this means that it can shoot down your ATGM with its active protection system. There are at least 2 guns with 2 shots each covering each 20 degrees in front of the turret. Fortunately, the protection arc is quite narrow, its reaction time is not great, it seems to not understand if there are multiple missiles flying after one another, and there are blind spots on the lower half. Generally, the system shoots down missiles high in the sky, but fails to hit missiles that go along the ground, and it will fail to stop any missiles suddenly appearing from behind an obstacle (for example, if the tank doesn't fully expose the turret over a hill). To straight up obliterate it frontally, launch at least two missiles and guide them to a single side of the tank to overload APS (do not shake them horizontally or APS on both sides of the turret might fire) and crush the tank.
Pros and cons
Pros:
- Is able to use tandem missiles, which penetrate ERA at almost any angle of attack and also have a chance of penetrating the IPM1's turret frontally if the user controls them well
- Missiles can cause overpressure damage through more armour than normal HEAT ATGM, meaning it's possible to destroy tanks by hitting their cupolas, even if they try to avoid fighting you
- Has a three-shot launcher, which is a step down from the Striker, but it can guide all three missiles simultaneously
- Missiles are immune to jammers
- Can relocate fast on maps with a lot of paved roads after having researched mobility upgrades and often can get to the advantageous position at the beginning of the match before being sniped
- Missiles have reasonable vertical mobility, though this is often irrelevant in RB due to mediocre camera depression
- While clumsy, the ZT3A2's chassis are able to climb at very sharp angles (60-70 degree inclination even when stock in AB) and it can get on top of certain objects the Striker or other ATGM tanks would not be able to climb
- Tall profile allows it to fire directly over certain cover which other tanks normally see as a full cover or an indestructible wall, for example, destroyed building debris, cargo containers or a church, potentially surprising some enemies
Cons:
- Missiles do not turn well in the horizontal plane and are especially unresponsive in RB, can easily overshoot during a turn if used incorrectly
- Vertical depression is not too great on the launcher, and missiles tend to crash into the carrier's own cover, which can limit launch options from high ground in RB or at point-blank range in any mode (not as much of an issue in AB)
- In SB, the hull must be exposed to make a direct shot and almost any responding shot to the top of the hull will destroy the weapon, ammo rack, or enough crew to count as crew knockout, even a single glancing hit from ZSU-57-2 may be enough. In AB/RB it still has to be careful, as any direct hit to the missiles will make them explode the carrier
- Slow when driving offroad and in general drives more like a bus rather than a tank or a regular armoured car
- Must make a complete stop to fire, which makes it incapable of fighting any kind of light tanks or SPAA directly
- Missiles are rather slow, only 20-40 m/s faster than MILAN
- Reloads only after spending all three shots (but reloads all three at once), does not automatically reload during rearm like the Striker
- Has obsolete smoke grenades and only has one group of them
- Too tall to drive under bridges on most maps (on some maps, cannot attack a capture point with others)
History
Devblog
In the early 1960s, the South African military already identified the need for anti-tank missile capabilities. Subsequently, this led to South Africa procuring the MILAN ATGM in the early to mid 1970s. However, early use experience with the MILAN highlighted the weapon's unsuitability for the African tropical conditions.
Being a wire-guided missile, the MILAN's control wire had a tendency to get caught up in the thick African bush and get severed, causing the missile to go off target and making engaging moving targets even more challenging. As a result, the decision was made to procure a laser-guided missile. However, as international arms embargoes were imposed on South Africa, simply acquiring an existing weapon off the export market wasn't possible. Therefore, South African engineers at the Kentron company went about designing their own laser-guided ATGM in the late 1970s.
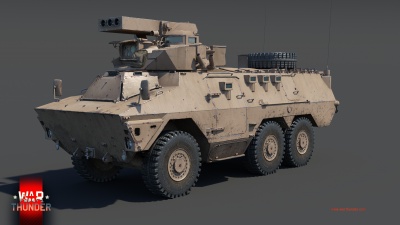
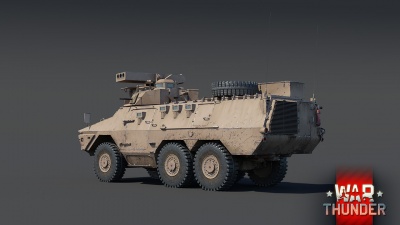
The result of this undertaking was the creation of the ZT3 missile system. By the time the ZT3 system had been ready for production in 1986, plans were being drawn up for a modified Ratel 20 housing the newly developed ZT3 missile launcher in a modified Ratel 60 turret. The modified Ratel with the ZT3 missile system was developed in order to supplement the Ratel 90s in anti-tank operations as the latter often struggled to engage heavy armour in direct combat.
The Ratel ZT3-A1 entered production in 1987 and around 90vehicles of the type had been built by 1993. The ZT3-A2 was introduced in 2008 and continues its successful operation with SANDF units till the present day.
Media
- Skins
- Images
See also
External links
| Sandock-Austral | |
|---|---|
| Ratel | Ratel 90 · Ratel 20 · ZT3A2 |
| Eland | Eland 90 Mk.7 |
| Britain tank destroyers | |
|---|---|
| Infantry tank derivatives | Archer · Gun Carrier (3-in) |
| Light tank derivatives | Alecto I |
| M10 Achilles | Achilles · Achilles (65 Rg.) |
| Centurion derivatives | FV4005 · Conway |
| ATGM | Swingfire · Striker |
| Other | Tortoise · ▄M109A1 |
| Canada | QF 3.7 Ram |
| South Africa | G6 · ZT3A2 |